Light-sheet illumination setups for zebrafish brain imaging
A light-sheet setup can give you a remarkably clean view of neural activity across a larval zebrafish brain—until the illumination geometry starts creating problems of its own.
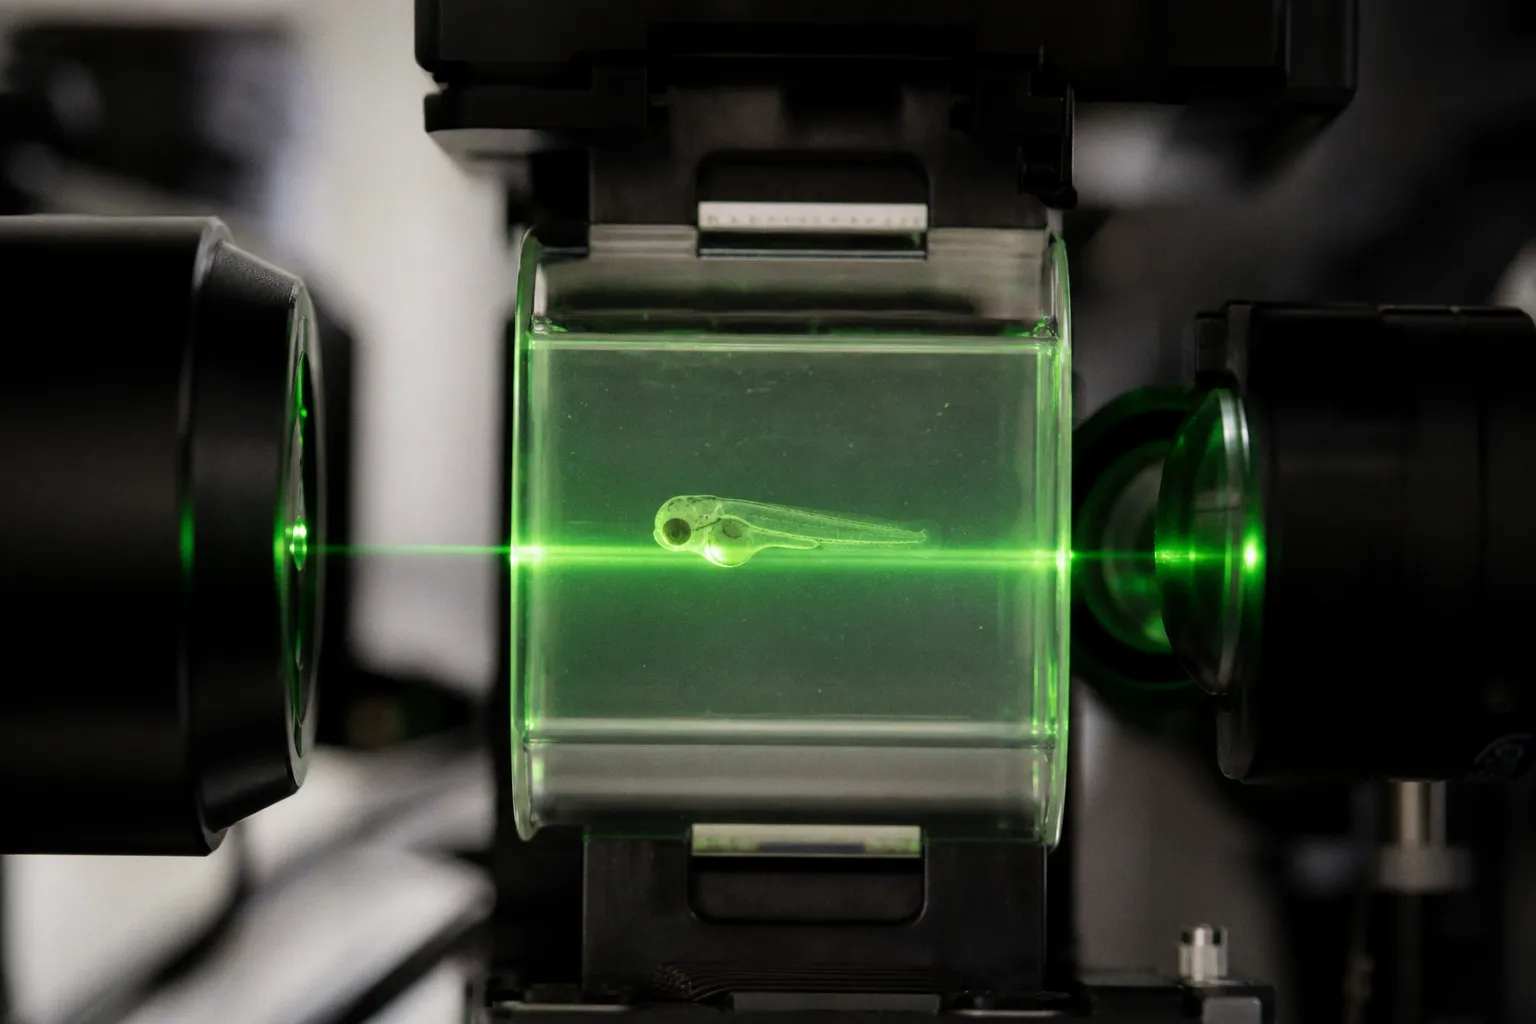
The usual symptoms are familiar: the mid-plane looks dimmer than the edges, the calcium traces are full of visual responses you did not intend to evoke, or the whole-brain volume takes so long to acquire that the behavior you wanted to study has already changed.
Compare car rental deals in United Kingdom
See available offersPartner link — DiscoverCars comparisonThat is where the light sheet illumination configuration for a zebrafish brain stops being a matter of choosing an attractive optical diagram. The arrangement of the excitation beams, the detection axis, the optical access around the eyes, and the excitation wavelength all shape the biology you can trust. Let’s compare the main configurations and, more importantly, match each one to the problem it actually solves.
Start with the geometry: why the light sheet is different
Light-sheet fluorescence microscopy, or LSFM, separates illumination from detection. A thin laser sheet enters the sample from one direction, while the collection objective observes the illuminated plane from an orthogonal direction—typically at 90 degrees.
That simple separation is the foundation of the method. In a confocal microscope, a point-scanning beam must visit the sample across the image, and the system rejects out-of-focus light after excitation has already occurred. In LSFM, the microscope illuminates only a thin optical section at a time. The detection objective collects fluorescence from that plane while much of the surrounding tissue remains unexcited.
In practical terms, this reduces out-of-focus background and photobleaching compared with confocal point-scanning approaches. It also gives the method its most useful feature for zebrafish neurobiology: speed across a large volume without bathing the entire brain in excitation light.
That benefit is not magic, and the optical section is not automatically perfect. The sheet must remain thin and reasonably uniform across the field of view, while the detection objective must collect enough emitted light through the larval head. Scattering, refractive-index differences, and the geometry of the specimen all begin to matter once you move beyond a single plane.
For larval zebrafish, the usual target is a 4–7 days post-fertilization brain expressing a calcium sensor such as GCaMP. A whole-brain acquisition may include more than 40 optical planes per volume, with volumetric rates typically ranging from about 0.8 Hz to 5 Hz across tens of thousands of neurons. Those numbers are useful, but they should not be treated as a promise printed on the microscope. Your usable rate depends on the thickness of each plane, the number of planes, camera readout, stage motion, signal strength, and how much illumination you can apply before the tissue starts sending you noise instead of biology.
The clean signal comes from the whole geometry working together: sheet thickness, detection angle, specimen access, and acquisition timing—not from the laser wavelength alone.
A good first-pass light sheet illumination configuration for a zebrafish brain therefore has four jobs:
- illuminate a sufficiently thin plane across the required field of view;
- deliver excitation without excessive photobleaching or phototoxicity;
- preserve access for the detection objective and the mounted larva;
- avoid turning the eyes into an unintended visual stimulation experiment.
The fourth point becomes especially important in functional imaging.
Single-sided illumination: the straightforward configuration with a known weakness
The classic LSFM arrangement uses one excitation objective to project a light sheet through the larval head and one detection objective positioned orthogonally to collect the fluorescence. This is mechanically direct and relatively easy to understand during alignment: one beam creates the sheet, the other objective sees the plane.
For small fields of view and favorable optical access, single-sided illumination can be perfectly workable. It may also be the most sensible configuration when your immediate priority is a compact setup, a simple alignment routine, or imaging a region where scattering is not yet dominating the signal.
The trouble appears when the sheet travels through the head over a larger distance. Biological tissue does not treat the sheet as a ruler-straight, perfectly preserved plane. Scattering degrades the illumination as it propagates, and the far side of the field can lose both intensity and sectioning quality. You may still obtain a visually attractive dataset, but the signal-to-noise ratio will not be uniform from one side of the brain to the other.
This is one of those failures that can hide in a maximum-intensity projection. The projection looks complete; the individual planes tell a less flattering story. Neurons near the entry side may have strong fluorescence, while neurons deeper along the illumination path appear dimmer, blurrier, or more sensitive to background.
When you compare larval zebrafish imaging resolution across a volume, do not look only at the sharpest region. Inspect the entire field. Ask whether cell bodies remain separable near the mid-plane and far side, whether baseline fluorescence varies with position, and whether calcium-event detection becomes less reliable as the sheet travels through the tissue.
A single-sided system is also more vulnerable to local imperfections in the specimen. A slight change in mounting angle, pigment, tissue thickness, or the position of the larval head can shift the balance between a clean plane and a soft, uneven one. The configuration is not bad; it simply gives you fewer ways to compensate when the optical path becomes difficult.
Dual-sided illumination: correcting the mid-plane problem
A dual-sided light-sheet configuration approaches the larval brain from both sides. The two excitation paths produce overlapping light sheets, allowing the system to illuminate the field from opposite directions rather than asking one sheet to survive the entire optical journey alone.
This architecture is particularly useful for reducing the uneven illumination and optical degradation that can appear across the mid-plane of the head. Each sheet covers part of the path with less distance to travel through scattering tissue, and the overlap helps maintain coverage where a single-sided beam would otherwise weaken.
In a zebrafish whole-brain imaging setup, dual-sided illumination can be implemented in several ways. The beams may alternate, overlap in the same acquisition, or be coordinated with the detection sequence, depending on the instrument design. The exact mechanical arrangement varies between laboratories, and there is no universal lens specification or one correct custom-built layout that fits every microscope.
The principle is more stable than the hardware: illuminate from both sides so that neither beam has to do all the work.
What dual-sided illumination improves
A well-aligned dual-sided system can help with:
- more even excitation across the field of view;
- reduced dependence on a single beam path through scattering tissue;
- better coverage of the mid-plane;
- more consistent fluorescence across a large volume;
- improved comparability between neurons located at different positions in the brain.
The key word is aligned. Two imperfect sheets do not automatically make one excellent sheet. If the beams do not overlap correctly, the dataset can develop a seam: cells on one side appear brighter, the transition region has a different background, or the two illumination paths produce slightly different contrast. You can end up with a dual-sided setup that has doubled the number of alignment problems without solving the original one.
Let’s use a practical what-if. What if the anterior region is bright, the posterior region is acceptable, but the central volume is weak? First, confirm that you are looking at a real illumination problem rather than anatomy or expression differences. Then inspect each beam independently. If one side produces a clean sheet and the other is broad or tilted, combining them will not rescue the volume. Fix the individual paths before optimizing their overlap.
The same logic applies to quantification. If you alternate illumination from the two sides, the intensity and background of each acquisition should be characterized rather than silently merged. Otherwise, your calcium traces may contain an optical rhythm that resembles a biological rhythm. That is classic lab noise wearing a tiny neural costume.
Dual-sided illumination is not simply “more light.” It is a way to shorten the difficult optical path and make the volume behave more uniformly.
Retinal stimulation: the problem that can invalidate a beautiful dataset
Functional imaging introduces a specific hazard in larval zebrafish: the excitation light can stimulate the eyes. This is most obvious with one-photon excitation when the scanning pattern passes directly over the eyes. For green fluorescent proteins and GCaMP, the excitation is commonly around 488 nm, and that visible light can become a visual stimulus rather than a neutral imaging input.
If your experiment measures spontaneous activity, motor-state transitions, sensory processing, or responses to a carefully controlled stimulus, unintended retinal illumination is not a minor technical detail. It changes the experiment.
A larva can show neural activity because of the optical scan itself. The resulting whole-brain pattern may look highly structured, reproducible, and biologically meaningful. It may also be your microscope asking the visual system to respond on every volume. The data can be clean and wrong at the same time, which is a particularly expensive form of wrong.
Eye-exclusion strategies in 1P systems
One approach uses front-and-side dual-beam scanning while preserving an optical exclusion region over the eye. The scanning pattern is designed to cover the brain without directly sweeping the excitation beam across the retinal region.
This requires you to think about the animal’s anatomy during beam design, not after acquisition. The exclusion region must be large enough to prevent direct eye exposure while still leaving useful coverage of nearby neural tissue. You should also confirm that the beam does not reach the eye indirectly through stray illumination, reflections, or an overly broad sheet.
A second approach uses an invisible near-infrared excitation wavelength in a two-photon light-sheet configuration, commonly in the approximately 900–940 nm range. Because this light is outside the visible range, it can reduce the risk of direct visual stimulation associated with visible one-photon scans. That does not remove the need for careful optical control, but it changes the stimulation problem at its source.
For a functional experiment, the configuration comparison looks like this:
| Parameter | One-photon light sheet | Two-photon light sheet |
|---|---|---|
| Typical excitation regime | Visible excitation, commonly around 488 nm for GFP/GCaMP | Near-infrared excitation, commonly around 920–940 nm |
| Main practical advantage | Efficient fluorescence excitation with relatively straightforward GFP/GCaMP-compatible optics | Reduced risk of direct visual stimulation from visible scanning light |
| Main concern | Direct scanning across the eyes can stimulate the retina | More specialized excitation and beam-scanning requirements |
| Useful mitigation | Eye-exclusion region and front-and-side dual-beam scanning | Near-infrared excitation that avoids visible retinal stimulation |
| Best fit | Functional imaging when eye access and scan geometry can be carefully controlled | Experiments where avoiding visual artifacts is a central requirement |
The table is a starting point, not a verdict. One-photon systems remain useful when their scan geometry protects the eyes and when the experiment does not confuse illumination with stimulus. Two-photon light-sheet systems can be powerful when retinal stimulation is especially damaging to interpretation, but they bring their own optical complexity.
Before you choose between them, define what counts as a prohibited stimulus in your experiment. A setup that is adequate for mapping anatomy may be unacceptable for spontaneous whole-brain activity. A scan that is harmless for a dark-adapted preparation may be a meaningful stimulus in a visual behavior assay. The right configuration is the one that preserves the biological question, not the one with the most impressive component list.
One-photon versus two-photon excitation: compare the experiment, not the marketing label
One-photon and two-photon light-sheet excitation differ in how they deliver energy to the fluorescent sensor, but the practical comparison should begin with the measurement you want to make.
One-photon excitation around 488 nm is familiar for GFP and GCaMP imaging and can support rapid volumetric acquisition. In a carefully designed light-sheet system, the illumination is confined to a plane, which helps reduce photobleaching and out-of-focus background compared with point-scanning approaches. The challenge is that visible light interacts with the larva’s visual system, especially when the scan crosses the eyes.
Two-photon excitation uses near-infrared light, often around 920–940 nm for fluorescent calcium indicators. In a light-sheet arrangement, this can help avoid direct visual stimulation from visible excitation. Two-photon approaches may also be paired with specialized beam-scanning patterns to create the required volumetric illumination. The trade-off is a more specialized optical path and a configuration that may demand more careful integration of scanning, focusing, and detection.
Let’s make the decision concrete.
Choose a 1P-oriented configuration when:
- you need a relatively direct route to GFP or GCaMP excitation;
- the field of view and acquisition speed are compatible with the visible-light geometry;
- you can implement an eye-exclusion region;
- your controls can demonstrate that the scan does not create the neural response you are measuring.
Consider a 2P light-sheet configuration when:
- direct retinal stimulation would compromise the experiment;
- the near-infrared excitation regime fits the sensor and optical design;
- you are prepared to manage a more specialized beam-scanning architecture;
- functional specificity matters more than keeping the illumination path simple.
Do not turn this into a false binary. In both cases, the same basic discipline applies: measure baseline behavior, monitor the timing of illumination, and include controls that separate the animal’s response to the experimental stimulus from its response to the microscope.
The microscope does not know which part of your protocol is the stimulus. You have to tell it by design.
Field of view and resolution: wider is not automatically better
The field of view in larval zebrafish imaging can range from roughly 600 × 600 micrometers to multi-millimeter scales with specialized optics. That range is useful because zebrafish neurobiology often asks for both local and global answers: what happens in a particular circuit, and how does activity propagate across the brain?
A larger field can support whole-brain coverage, but it also increases the demands on sheet uniformity, detection quality, camera sampling, and specimen positioning. If you expand the illuminated area without preserving the effective optical section, you may gain coverage while losing the clean signal needed to distinguish neighboring neurons.
For cell-resolved functional imaging, resolution is not one number. You need to think about several linked properties:
- Lateral detail: can neighboring fluorescent structures remain separated in the image plane?
- Axial sectioning: does the sheet isolate the intended optical plane without excessive thickness or background?
- Uniformity: do those properties remain stable across the full field?
- Temporal sampling: can the volume be acquired quickly enough to follow the calcium dynamics of interest?
- Signal stability: does repeated imaging preserve usable fluorescence without unacceptable bleaching?
The light sheet’s main advantage is high-speed, low-phototoxic volumetric imaging, not an automatic guarantee of superior axial resolution over confocal microscopy. Thin sheets and optical sectioning strategies matter, but the comparison has to stay specific to the actual optical design.
Here is another what-if. What if you can see individual neurons clearly in a small region, but the whole-brain dataset becomes soft after expanding the field? Do not immediately increase laser power. First check whether the sheet has become too thick or uneven at the wider aperture, whether the detection objective is collecting the relevant emission efficiently, and whether scattering is reducing contrast across the head. More power may brighten the image while increasing photobleaching and background. That is not optimization; it is turning up the volume on a noisy conversation.
Acquisition rate: the volume must keep up with the biology
Whole-brain functional imaging in 4–7 d.p.f. larvae commonly operates at volumetric rates of about 0.8–5 Hz, with volumes built from more than 40 optical planes and recordings spanning tens of thousands of neurons. Those rates place the experiment in an interesting middle ground: fast enough to follow broad neural dynamics, but not so fast that every biological process can be treated as fully resolved.
A 5 Hz volume rate means a different temporal sampling regime from 0.8 Hz. The right value depends on the calcium sensor, the behavior or stimulus, the number of planes, and the signal quality you can maintain. If your volume is too slow, a brief event may be blurred across frames or missed between acquisitions. If you push the rate by reducing exposure or signal, you may produce a fast sequence with traces that are too noisy to interpret.
A useful way to plan the prep is to work backward from the biological event:
1. Define the shortest activity feature you need to distinguish.
2. Decide how many optical planes are necessary to cover the brain region.
3. Set a volume rate that samples the event adequately.
4. Check whether the resulting exposure and signal level preserve reliable calcium traces.
5. Test the same acquisition timing with the animal’s behavioral or sensory context included.
The number of optical planes is not merely an imaging detail. More planes can improve volumetric coverage, but each plane adds acquisition time and may increase the total light dose. A dual-sided configuration may improve signal uniformity across those planes, while an eye-exclusion scan may add geometric constraints to the path. Everything is coupled, because microscopes enjoy making us solve several problems at once.
When comparing setups, record the full acquisition recipe rather than quoting only the frame rate. At minimum, keep track of:
- number of planes per volume;
- exposure or dwell conditions;
- illumination side and scan sequence;
- excitation regime;
- field of view;
- whether the scan path excludes the eyes;
- the resulting baseline fluorescence and calcium-event quality.
This is how you distinguish a genuinely faster setup from one that simply reports a faster camera readout while the biological volume still arrives too slowly.
A volume rate is useful only when the volume still contains a clean, interpretable signal.
Choosing the configuration for the question in front of you
The best light sheet illumination configuration for a zebrafish brain is not universal. It is a negotiation between optical access, brain coverage, retinal safety, temporal resolution, and the amount of alignment complexity your experiment can tolerate.
For a local or moderately sized field with relatively manageable scattering, single-sided illumination may be enough. It offers a simpler optical arrangement, provided you verify that the far side of the field does not quietly lose signal.
For broader coverage and more even illumination, dual-sided light-sheet microscopy is usually the stronger architecture. It addresses the mid-plane and reduces the burden placed on a single excitation path. But it also requires disciplined alignment and careful handling of intensity differences between the two beams.
For functional imaging with visible 1P excitation, the eye-exclusion region is not optional decoration. Build the scan around the larva’s visual anatomy and validate the result with controls. If visual stimulation would contaminate the question, a near-infrared 2P light-sheet approach may offer a cleaner route, provided the specialized setup fits your lab’s optical and acquisition demands.
And when your whole-brain imaging resolution looks inconsistent, resist the instinct to diagnose everything as a focus problem. Check the illumination path, scattering, sheet overlap, field size, and acquisition timing. The fault may be distributed across the configuration rather than sitting in one obvious knob.
We do not need a heroic microscope to get meaningful zebrafish brain data. We need a configuration that respects the animal, the optics, and the time scale of the neural event. Start with the failure your current setup is giving you—uneven signal, retinal stimulation, slow volumes, or excessive bleaching—and choose the illumination architecture that fixes that failure directly. Then run the prep again with controls in place, inspect the planes rather than only the projection, and keep the signal clean enough that the biology gets the final word.